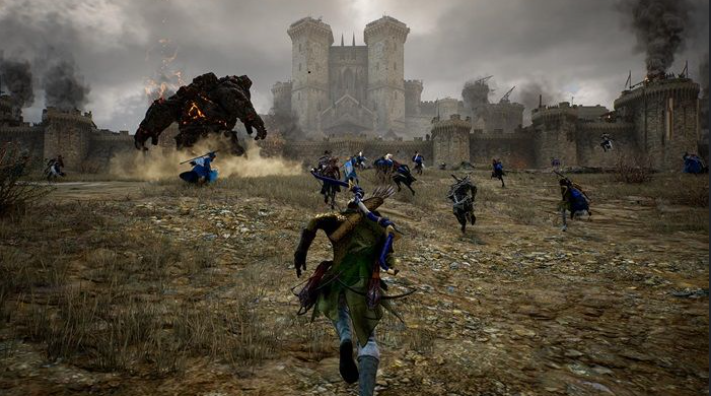
Navigating through the Island of Terror in Throne and Liberty presents a formidable challenge, replete with intricate mechanics demanding precision and strategy. Each encounter with the boss unveils layers of complexity, testing the resilience and coordination of every adventurer daring to brave its depths. Let's delve into a comprehensive breakdown of these mechanics, unraveling the intricacies and offering strategies for triumph in the face of adversity. Get your Throne and Liberty Lucent ready for this boss fight!
Mechanic 1
The tank will draw the boss's attention, but it's crucial to note that the boss inflicts significantly more damage than the standard dungeon enemies. After launching four fireballs, the boss will invariably stun the tank.
Hence, if a party member possesses a cleansing ability, such as a long-wheel user with Purify (excluding Nature's Blessing Purify), they can aid the tank in freeing themselves, enabling them to prepare for the subsequent mechanic.
Without this support, the tank will endure the heavy attack, and unless their health pool exceeds 15,000 HP, survival becomes precarious with each encounter.
Mechanic 2
The boss will execute a pulsating heavy attack. When you observe this pulsation, it indicates that you can execute either a stationary block or a moving block.
Notably, a stationary block occurs when you remain static while blocking, whereas a moving block results from pressing any directional key while blocking. This distinction is valuable for the subsequent mechanic.
As a personal strategy, I count to three before initiating my block after the pulsations cease.
Mechanic 3
You will encounter a diamond or square-shaped purple heavy attack, necessitating a movement block to evade being struck.
It's crucial to note that upon executing either a movement block or a stationary block, promptly follow up with your retaliatory attack. Failure to do so may render you unable to block subsequent attacks.
Moreover, if the tank loses aggro, the boss will unleash consecutive heavy attacks, leaving you with no option but to block. In such instances, failing to utilize your counter move may result in inadvertent counters instead of blocks, leading to damage. Without at least 10,000 HP, survival becomes increasingly uncertain.
Mechanic 4
The boss will repeatedly initiate the stationary block sequence during the fireball phase, which adds complexity to the encounter.
For the fourth mechanic, three fireballs will land randomly, and to influence their placement, all players must position themselves near vents. This doesn't entail being hit by the fireball but rather standing nearby, ready to move out quickly upon its appearance. This strategy is suitable for players with reliable internet connections or adept dodging skills.
Alternatively, players facing challenges with luck or low health can wait for the fireball to land and then intentionally run into it to gain a simple burn debuff. This debuff is crucial because it clears the vents, enabling the use of the geyser for the fifth mechanic. Failure to clear the vents will obstruct visibility of the geyser, rendering it unusable even if selected.
To clear the vents with burn debuffs, simply run over the flames, but be cautious not to linger, as the debuff duration is brief. However, remain vigilant, as the boss will execute another heavy attack after the fireball phase, necessitating readiness while cleansing.
Following the fireball phase, lizards will spawn. In my group, we centralize around the boss after fireballs to efficiently eliminate the lizards with area-of-effect abilities and mitigate damage with a user's group heal.
After two heavy attacks, the boss will transition to geysers. It's crucial to note that after the second block, if the boss hits you, you'll endure a movement speed debuff, making it challenging to reach the geysers if you survive. Therefore, avoiding hits is paramount, as navigating to the geysers with reduced movement speed can prove exceedingly difficult and potentially insurmountable.
Mechanic 5
Now, transitioning to the fifth mechanic: geysers.
You must approach the designated geyser that is emitting bubbles. It's crucial to reiterate that failure to cleanse any chosen geyser will render the vent inoperable, resulting in a game-ending scenario. Conversely, successfully clearing it will maintain the previous pattern, returning to the damage per second phase.
However, there will be only one functioning vent. Subsequently, following two additional heavy attacks post-geyser phase, the boss will enter its most challenging phase.
Mechanic 6
The sixth mechanic introduces the rat phase, which proves to be the most challenging aspect due to its timing intricacies.
For players in North America, latency issues can exacerbate the difficulty. It's imperative not to exit the designated circle prematurely, refrain from digging immediately to avoid being stunned, and avoid rushing to cleanse, which could result in a wipe. Additionally, attempting to evade the orbs is futile, as being hit triggers a prolonged fear effect.
The optimal strategy involves creating some distance between party members to discern the boss's target, ensuring everyone absorbs the initial hit. The boss unleashes a shockwave attack, dealing varying damage depending on the player's defense, and inflicts a movement speed debuff for about 20 seconds.
After striking all players, the boss selects a target rat. To successfully evade, all players must remain above ground. As the boss moves to bite the first target, timely digging is crucial to avoid being consumed. This pattern repeats until all nearby rats are successfully evaded.
Once all rats are successfully avoided, the boss is temporarily stunned, allowing players to proceed to their designated plants for cleansing. This meticulous execution is the sole means to overcome this mechanic.
With the completion of this phase, the dungeon cycles back to its initial pattern, requiring players to repeat the process. While the challenge is rewarding for some, it may prove daunting for the average player, and adjustments may be made in future updates to mitigate its difficulty.
Visit our website MMOWOW to purchase Throne and Liberty Lucent at the cheapest rate on the web. We offer quick delivery, safe payments, and 24x7 chat support.