News
Pokemon Champions Mega Stones Explained: How To Get And How To Use
Posted: May 17,2026Pokemon Champions Mega Stones Explained: How To Get And How To Use What Are Mega Stones and Why They Are Crucial in Pokemon Champions Pokemon Champions has officially launched, bringing back one of the most beloved battle mechanics in the entire Pokemon franchise, which is Mega Evolution powered by Mega Stones. Every trainer looking to dominate competitive matches and strengthen their team must fully understand what Mega Stones are, how to collect Mega Stones, and how to properly use Mega Stones during battles. Mega Stones have always been a core item that changes the entire combat system, and their return in Pokemon Champions has greatly enriched the gameplay for both new players and long-time Pokemon fans. Mastering Mega Stones is the key to unlocking your Pokemon’s hidden power and gaining a huge advantage against all kinds of opponents in Pokemon Champions. Core Definition and Functions of Mega Stones in Pokemon Gameplay Mega Stones are exclusive held items designed for specific Pokemon, and Mega Stones serve the unique purpose of triggering temporary Mega Evolution in battle. When a valid Pokemon holds its corresponding Mega Stones, it can undergo a special transformation that completely changes its in-game appearance. Beyond visual changes, Mega Stones also bring comprehensive attribute upgrades, including enhanced battle stats, adjusted elemental typing, and brand-new hidden abilities. These drastic improvements make Pokemon holding Mega Stones far more powerful than their regular forms, turning ordinary team members into core battle threats. In Pokemon Champions, Mega Stones remain the only item that can activate the iconic Mega Evolution system, making Mega Stones an indispensable part of competitive team building. Complete History of Mega Stones From Classic Games to Pokemon Champions The origin of Mega Stones can be traced back to the classic Nintendo 3DS era, where Mega Stones and the Mega Evolution mechanic first debuted in Pokemon X and Pokemon Y. After the initial release, Pokemon Omega Ruby and Alpha Sapphire expanded the item roster by adding dozens of new Mega Stones, further enriching the strategic gameplay of Mega Evolution. Although Pokemon Sun and Moon retained the existence of Mega Stones, the Mega Evolution system was temporarily suspended in subsequent game versions. After a long hiatus, Mega Stones made a stunning comeback in Pokemon Legends Z-A for Nintendo Switch and Nintendo Switch 2. The game launched a large number of brand-new Mega Stones, and the Pokemon Legends Z-A: Mega Dimension DLC continued to add more exclusive Mega Stones, and all these classic and latest Mega Stones have been perfectly inherited in Pokemon Champions. Practical Ways to Obtain Mega Stones in Pokemon Champions Players can obtain various rare Mega Stones through multiple stable in-game channels in Pokemon Champions, allowing every trainer to gradually complete their Mega Stones collection through normal gameplay. The most common way to get Mega Stones is by completing daily battles, ranked matches, and in-game missions to earn in-game currency, which can be exchanged for official Mega Stones in the game shop. In addition, seasonal battle pass rewards also provide free and premium Mega Stones, giving players extra opportunities to collect limited Mega Stones. Event rewards and system tutorials also offer beginner-friendly Mega Stones, lowering the entry threshold for new players to experience Mega Evolution. With continuous game updates, more exclusive Mega Stones will be added to Pokemon Champions, giving players more strategic options for team matching. How to Equip and Use Mega Stones to Activate Mega Evolution Using Mega Stones in Pokemon Champions follows simple and fixed rules, and players can quickly get started after familiarizing themselves with the operation steps. First, players need to match each Pokemon with its exclusive Mega Stones, as each type of Pokemon can only correspond to one specific Mega Stone, and cross-equipment is not allowed. After equipping the correct Mega Stones as held items, players can trigger Mega Evolution at the right time during battle. Once activated, the Pokemon will complete its Mega transformation instantly, obtain full stat boosts and new abilities, and maintain the enhanced state until the end of the battle. Skilled use of Mega Stones in key battles can reverse disadvantaged situations and easily defeat powerful opponents, making Mega Stones the core strategic item for high-rank matches in Pokemon Champions. The Strategic Value of Mega Stones for Competitive Battles Mega Stones have always been a game-changing item in the Pokemon series, and Mega Stones maintain extremely high strategic value in Pokemon Champions. A large number of ordinary Pokemon can jump to top-tier competitive strength after activating Mega Evolution through matching Mega Stones, greatly enriching the diversity of mainstream teams. Whether players are engaged in casual daily battles or professional ranked competitions, sufficient Mega Stones reserves can ensure flexible team building and diverse battle tactics. For every trainer pursuing stronger combat power and higher rankings, collecting and mastering all types of Mega Stones is an essential step to improve their overall gaming strength in Pokemon Champions. Visit our website MMOWOW to get Pokemon Legends Z-A items at the cheapest rate on the web. We offer quick delivery, safe payments, and 24x7 chat support.

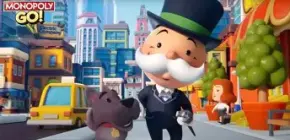
Monopoly Go! Board Game Launches as New Iteration of Classic Game Franchise
Posted: May 16,2026Monopoly Continues Expansion With Brand-New Monopoly Go! Physical Board Game The Monopoly brand has long been one of the most flexible and adaptable game franchises in the global entertainment industry, with dozens of themed versions released to match popular brands, cultural trends, and milestone moments across decades. No matter what mainstream brand or viral cultural phenomenon emerges, there is almost always a customized Monopoly edition tailored to it, proving the timeless influence of the classic board game. The newest addition to this massive product lineup is the official Monopoly Go! board game, which officially launched on Thursday. Developed and launched by Hasbro, this brand-new physical board game is uniquely derived from the hit mobile game Monopoly Go!, creating an interesting circular iteration: a traditional offline board game that spawned a mobile adaptation, and now returns to a refined physical board game form once again. Strong Market Performance Paves the Way for Monopoly Go! Physical Edition Release While the reverse derivation model of the Monopoly Go! board game sounds unusual at first glance, it is a highly reasonable commercial move based on the mobile game’s explosive market performance. Scopely, the developer of Monopoly Go!, and Hasbro officially announced impressive operating data in March, showing that the revenue of Monopoly Go! exceeded a staggering $2 billion merely ten months after its official launch. Such outstanding revenue results are far beyond the average level of casual mobile games, fully demonstrating the huge market potential and commercial value of the Monopoly Go! IP. This outstanding market performance has laid a solid foundation for the launch of the new physical board game. Massive Daily Active Users Prove Monopoly Go!’s Sustained Popularity The extraordinary revenue growth of Monopoly Go! is backed by its extremely high user activity and stable player stickiness. Scopely CEO Javier Ferreira revealed in the March announcement that more than 8 million players engage with Monopoly Go! every single day throughout the week, with the total daily active player base reaching 10 million across all platforms. For most mobile game products in the current competitive gaming market, such a huge and stable daily user volume is an unattainable goal. The enduring popularity of Monopoly Go! among global players gives the new physical board game a large existing audience group, helping the new product quickly gain market attention after its release. Innovative Gameplay Simplifies Classic Rules and Optimizes Player Experience The newly launched Monopoly Go! board game is designed to convert the mobile game’s online entertainment experience into an interactive offline social experience, guiding players to put down their mobile phones and enjoy in-person board game fun with friends. Different from the traditional single-board Monopoly mode, the Monopoly Go! board game adopts an innovative multi-board gameplay, supporting two to four players to participate in the game at the same time. Each player is equipped with an independent small Monopoly board, which perfectly restores the core gameplay of the “Landmark Rush” daily event in the Monopoly Go! mobile game. Players need to race against opponents to build landmarks, and the first player to stack four complete landmark blocks on their exclusive board will win the final victory. Classic Mobile Game Mechanisms Are Retained in the New Board Game To maintain the core charm of Monopoly Go!, the new physical board game also incorporates classic competitive mechanisms from the mobile version, making the offline gameplay more strategic and interesting. Popular interactive gameplay such as bank heists and system shutdowns in Monopoly Go! has been perfectly transplanted into the physical board game. These ingenious mechanisms allow players to interfere with and suppress opponents’ progress during the game, increasing the competitiveness and fun of offline battles. Compared with traditional Monopoly and the complex operation rules of the mobile game, the Monopoly Go! board game further simplifies the overall rules, eliminating cumbersome links such as manual cash management and bank fund scheduling, making the game easier to get started for players of all ages. Monopoly Go! Board Game Balances Simplicity and Classic IP Charm The launch of the Monopoly Go! board game not only enriches the product matrix of the classic Monopoly IP but also builds a bridge connecting online mobile gameplay and offline social entertainment. By retaining the most popular core mechanisms of Monopoly Go! and simplifying redundant and complicated rules, the new board game realizes the perfect adaptation of online popular gameplay to offline physical interaction. It not only caters to the playing habits of existing Monopoly Go! mobile game fans but also lowers the entry threshold for new players, allowing the century-old classic Monopoly brand to continue maintaining its youthful vitality and market competitiveness in the new gaming era. Visit our website MMOWOW to buy monopoly go dice at the cheapest rate on the web. We offer quick delivery, safe payments, and 24x7 chat support.

The Hidden True Origin and Original Purpose of the Classic Board Game Monopoly
Posted: May 15,2026<h1>The Hidden True Origin and Original Purpose of the Classic Board Game Monopoly</h1> <h2>The Little-Known Original Background of Monopoly</h2> <p>Most modern players regard <strong>Monopoly</strong> as a fun, competitive board game focused on buying lands, building properties, and defeating opponents. However, the creation story of <strong>Monopoly</strong> is far different from what people assume today. Long before the commercial version became popular worldwide, the earliest design of <strong>Monopoly</strong> was completed between 1902 and 1903 by inventor Elizabeth Magie. She developed and playtested a board game named The Landlord’s Game in Arden, Delaware, which served as the original prototype of today’s famous <strong>Monopoly</strong>. Unlike the entertaining competitive style of modern <strong>Monopoly</strong>, this early version was created purely as an educational tool to spread progressive economic ideas to ordinary people.</p> <h2>The Educational Philosophy Behind Monopoly’s Creation</h2> <p>The core purpose behind the creation of the original <strong>Monopoly</strong> prototype was to explain and promote Georgism, a unique economic philosophy that emphasizes fair land wealth distribution. Elizabeth Magie hoped that through the intuitive gameplay of <strong>Monopoly</strong>, ordinary citizens could easily understand how land monopoly concentrates wealth in the hands of a small number of people. At that time, social wealth and land resources were heavily controlled by elites, leaving the general public with limited development opportunities. By designing <strong>Monopoly</strong>, Magie wanted to expose the flaws of unchecked capitalist accumulation, showing how monopolies can strip ordinary people of economic rights and create severe social inequality. This original intention makes <strong>Monopoly</strong> one of the most meaningful board games in history.</p> <h2>Dual Game Modes That Redefine Monopoly Gameplay</h2> <p>One of the most surprising features of early <strong>Monopoly</strong> is its dual rule system, which completely differs from the single competitive mode players know today. Elizabeth Magie designed two independent gameplay sets for the original <strong>Monopoly</strong> prototype to display two different economic systems. The first rule set adopts a cooperative mechanism, allowing all participants to accumulate wealth together and share resources fairly. This mode fully reflects the ideal economic model that Magie advocated, where land benefits belong to everyone in society. The second rule set is the competitive version that evolves into modern <strong>Monopoly</strong>, where players build monopolies, occupy lands, and compete fiercely to eliminate opponents and control all in-game wealth.</p> <h2>How Monopoly Evolved Into a Global Entertainment Classic</h2> <p>After more than a century of development and modification, <strong>Monopoly</strong> gradually abandoned its original educational and critical positioning and grew into a world-famous casual board game. The deep economic and social metaphors in the original <strong>Monopoly</strong> have been simplified, while the fun, strategic, and competitive attributes have been continuously strengthened. Modern <strong>Monopoly</strong> retains classic mechanisms such as land acquisition, rent collection, and asset expansion, adding diverse maps, interesting props, and rich random events. Whether for family entertainment, friend gatherings, or casual competitive matches, <strong>Monopoly</strong> can bring relaxing and exciting gaming experiences to players of all ages.</p> <h2>The Timeless Influence of Monopoly in the Gaming Industry</h2> <p>Today, <strong>Monopoly</strong> has become a timeless classic in the board game industry, loved by countless players across different countries and generations. The perfect combination of luck and strategy ensures that every round of <strong>Monopoly</strong> is unique and full of surprises. Although the original educational purpose of <strong>Monopoly</strong> is rarely mentioned by modern players, its profound historical background and innovative gameplay design lay a solid foundation for all modern property-competition board games. Even in the era of online games, <strong>Monopoly</strong> still maintains strong vitality and popularity.</p> Visit our website MMOWOW to buy monopoly go dice at the cheapest rate on the web. We offer quick delivery, safe payments, and 24x7 chat support.

Pokémon Legends: Z-A – Mega Dimension Expansion Physical Release Overview
Posted: May 14,2026New Physical Release for Mega Dimension DLC Pokémon Legends: Z-A’s paid DLC, Mega Dimension, originally launched digitally in 2025 for Nintendo Switch and Switch 2, is set to receive an official physical boxed release. Building on the base game’s storyline, the expansion adds new gameplay content, most notably exclusive Mega Evolutions unavailable in the base game’s launch version. Centered around Lumiose City, a classic location from Pokémon X and Y, the game brings back the beloved Mega Evolution mechanic that debuted in 2013’s 3DS Pokémon titles. It also introduces brand-new Mega forms for fan-favorite Pokémon such as Dragonite and Greninja, with some of these new designs already appearing in the Pokémon Trading Card Game. Release Date and Regional Availability According to Nintendo’s Malaysian website, the physical boxed version of the Mega Dimension DLC is scheduled to launch on March 19. Its packaging features the newly added Mega Raichu X and Mega Raichu Y as the core visual elements. At present, there are no official release announcements or relevant details for North America and other global regions, leaving international release plans unconfirmed. Code-in-Box Format and Practical Advantages Different from Pokémon Scarlet and Violet’s integrated physical cartridges that include both the base game and DLC, this new release adopts a pure code-in-box format. The package does not contain a game cartridge, only a redeemable eShop code that unlocks the Mega Dimension DLC for both Nintendo Switch and Switch 2 platforms. Although this format fails to meet the needs of collectors who pursue complete physical game media, the official boxed product still serves as a convenient and suitable choice for gifting purposes. Future DLC Possibilities and Physical Release Controversy Unresolved story threads in the Mega Dimension campaign suggest that additional DLC content for Pokémon Legends: Z-A may still be in development. With the next mainline Pokémon work, Pokémon Winds and Waves, not arriving on Switch 2 until 2027, new expansions can effectively maintain player activity for the current title. Meanwhile, the adoption of code-in-box releases has fueled ongoing discussions about Switch 2’s physical game distribution. While many collectors prefer full in-cartridge content, publishers are increasingly adopting digital code packaging formats. Nevertheless, a complete physical cartridge edition may be launched in the future if market demand continues to rise. Visit our website MMOWOW to get Pokemon Legends Z-A items at the cheapest rate on the web. We offer quick delivery, safe payments, and 24x7 chat support.
Complete Guide to Getting Rare Stickers Fast in Monopoly GO
Posted: May 13,2026Fastest Ways to Farm Rare Stickers in Monopoly GO Rare stickers in Monopoly GO mainly include 4-star, 5-star, and golden limited stickers, which have extremely low base drop rates. Opening sticker packs randomly is very inefficient. To obtain rare stickers in bulk and complete sticker sets quickly, follow the core strategy: save packs for boosted events, redeem guaranteed rewards, and fill missing stickers via trades. Below are the most effective methods sorted by priority, suitable for all players. Maximize Gains: Open Packs During Limited-Time Events (Must-Do) This is the best free method to boost rare sticker drop rates. Always save all sticker packs and only open them during dedicated events. Never open packs on normal days. Sticker Boom (Highest Cost Performance)Sticker Boom is a frequent limited-time event. During the event, all sticker packs receive a massive drop rate boost, with rare, 5-star, and golden sticker odds increased by over 50%. It is the best window for free players to farm rare stickers. Save all your regular packs, purple packs, and premium packs exclusively for this event to maximize high-value sticker drops. Golden Blitz (Golden Sticker Exclusive Event)This event features boosted golden sticker drops and unlocks a special trading window. It is also the only official period to trade golden stickers legally. Opening premium sticker packs during Golden Blitz greatly increases golden sticker output, perfect for completing full golden sets and collecting high-value rare golden stickers for trading. Monthly Themed & Milestone EventsMonthly events, carnival challenges, and board milestone rewards offer large quantities of premium purple packs and 5-star sticker packs. High-tier milestones even reward guaranteed 4-star and 5-star rare stickers, allowing you to collect rare resources steadily without random pack opening. Guaranteed Rewards: Wild Stickers & Sticker Vault (Zero Risk, Fill Missing Cards) These features are perfect for finishing the last few rare or 5-star stickers in a set, avoiding useless duplicate drops, and are essential for completing full collections. Wild stickers are the most reliable guaranteed rare sticker item in the game. You can use a wild sticker to obtain any missing sticker from your current album, including rare 5-star and limited golden stickers. They are mainly obtained from high-tier event milestones, official free rewards, and special missions. Always use wild stickers for the hardest-to-get 5-star rare stickers instead of wasting them on low-tier stickers. Duplicate stickers are automatically converted to sticker stars. You can unlock high-tier vaults with 250 stars and 1000 stars. The 1000-star top-tier vault has a high chance of rewarding wild stickers and premium rare stickers, serving as a stable long-term source for completing sticker sets. Never discard duplicate stickers casually. Visit our website MMOWOW to buy monopoly go dice at the cheapest rate on the web. We offer quick delivery, safe payments, and 24x7 chat support.

Helldivers 2 is Here: Next-Gen Tactical Shooters Reach New Heights
Posted: May 12,2026Immersive Third-Person Action Arrowhead Game Studios, the creators of the critically acclaimed Helldivers, have officially announced Helldivers 2, bringing the cooperative shooter franchise into the next generation. Departing from the top-down perspective of the original, the sequel adopts a third-person viewpoint, placing players directly in the heat of interstellar combat. Set in a galaxy threatened by hostile alien forces, players once again take the role of elite Helldivers defending Super Earth. With enhanced graphics, dynamic environments, and cinematic combat sequences, the game promises a more immersive and visually stunning experience than ever before. Expanded Arsenal and Tactical Gameplay The sequel emphasizes strategic, team-based gameplay, with missions designed for up to four players in cooperative multiplayer. Players can customize their loadouts with an expanded array of weapons, gadgets, and vehicles to adapt to different combat scenarios. From coordinated precision strikes to full-scale assaults, every mission encourages tactical thinking and quick decision-making. Environmental features, including destructible cover and interactive hazards, further enhance the tactical depth, allowing players to turn the battlefield to their advantage while navigating unpredictable alien encounters. Challenging Enemies and Dynamic Missions Arrowhead has significantly upgraded the enemy AI, introducing smarter and more adaptive alien forces that react dynamically to player strategies. The game will feature a wide variety of mission types, from high-intensity assaults to tactical defense operations, ensuring that no two experiences are the same. In addition to the main campaign, players can take part in optional cooperative events, daily challenges, and large-scale battles that test both individual skill and team coordination. Communication and planning remain central, with cross-platform multiplayer support allowing friends on PlayStation 5 and PC to join forces seamlessly. Release Information and Future Outlook Helldivers 2 is slated for release later this year on PlayStation 5 and PC, promising next-generation graphics, refined combat mechanics, and a deeply engaging cooperative experience. Fans are encouraged to follow official channels for trailers, developer insights, and behind-the-scenes updates. With its combination of tactical depth, fast-paced action, and visually stunning environments, Helldivers 2 is poised to be a standout title in 2026, appealing to both longtime fans of the franchise and newcomers seeking cooperative action in a rich sci-fi universe. Visit our website MMOWOW to get helldivers 2 items at the cheapest rate on the web. We offer quick delivery, safe payments, and 24x7 chat support.
Catch a Monster codes for May 2026 How to redeem Catch a Monster codes in Roblox.
Posted: May 11,2026Catch a Monster is a Roblox creature-collection game inspired by Pokémon. On your journey to catch monsters, you’ll battle wild creatures, collect them to build your team, and even hatch rare monsters from eggs. Looking for extra boosts? Use Catch a Monster codes to get event items, eggs, experience and coin potions, and even free monsters occasionally. The developer, Lighting Dragon Studios, usually shares these redemption codes on their official Discord server—but we’ve compiled all active and expired codes, plus redemption instructions, to save you valuable creature-collecting time. All Working Catch a Monster Codes Here are all the working Catch a Monster codes as of May 9, 2026: poseidive – 1 Void Jar, 1,500 Undine Coins, 1 Anchoring Core (NEW) vodiplate – 1 Void Jar, 1,000 Undine Coins (NEW) nampyra – 1 Blood Crystal Prison Egg, 1 Sovereign Core orange – 1 Legendary Chest purple – 1 Epic Chest rexie – 1 Sovereign Core, 1,500 Treasure Tickets ssentinel – 1 Bubbly Red Blaze Egg xp – 3 Small XP Potions coin – 3 Small Coin Potions cam – 3 Small XP Potions, 3 Small Coin Potions How to redeem codes in Catch a Monster Not sure how to redeem codes in Catch a Monster? Here’s what you’ll need to do: Launch Catch a Monster in Roblox. Click the gift box icon button in the top right corner of your screen. Image credit: Lighting Dragon Studios/Eurogamer 3.Type your code into the field that pops up and hit ‘Redeem.’ Image credit: Lighting Dragon Studios/Eurogamer Visit our website MMOWOW to get Pokemon Legends Z-A items at the cheapest rate on the web. We offer quick delivery, safe payments, and 24x7 chat support.

All free Monopoly Go Dice Links for May 2026
Posted: May 10,2026May 6, 2026: We have added this week’s new dice links and removed all expired ones. Free Monopoly Go dice links are your chance to get extra rolls on the board without spending money. Typically, you can get up to (and sometimes more than) 100 free dice links per month to boost your gameplay and earn more rewards. Even better, redeeming these free dice links is extremely easy—they’re added to your account in just a few seconds. You don’t even need to enter any codes. Of course, you can also earn extra rolls by collecting daily rewards and inviting friends to play, but nothing beats the simplicity of clicking a few buttons to get instant rewards. These links are also refreshed frequently. Below are the currently active dice links. Free Monopoly Go Dice Links – May 2026 75 Free Dice – Valid May 5 – May 7 You need to reach Level 15 to redeem Monopoly Go dice links, as the album feature is required. Once completed, click the link above on the device you use to play the game, and the free rolls will be added to your account. Each link can only be redeemed once. Visit our website MMOWOW to buy monopoly go dice at the cheapest rate on the web. We offer quick delivery, safe payments, and 24x7 chat support.
Helldivers 2 Machinery of Oppression Update 6.2.2 Makes Big Balance Changes, Adds Two New Biomes
Posted: May 09,20261. Overall Update Release Content The Helldivers 2: Oppressive Machines Version 6.2.2 patch is officially live. All patch notes are sourced from the official Steam platform. This update launches the brand-new Exosuit Specialist Battle Pass simultaneously. The Battle Pass includes multiple new exosuit skin designs. These new exosuits are perfectly tailored for melee combat and fire-based attack builds. 2. Key Update Highlights of This Version Version 6.2.2 brings comprehensive game adjustments and optimizations. The core updates are as follows: Added two brand-new game biomes Added a new enemy variant Massive stat rebalancing for all exosuit equipment Full adjustment to the strength and mechanics of all enemy units Attribute balancing for secondary weapons and stratagems Following traditional updates, numerous bugs and glitches have been fixed 3. Notable Fun Bug Fixes This update resolved many community-concerned quality-of-life issues. Major highlights include Fixed missing audio for the hearty laugh emote.Players can now use the laugh emote sound effect normally on the battlefield. Added exclusive celebration content for the tutorial completion.Fireworks will automatically trigger after players finish the tutorial. 4. New Forest Biome Lore The newly added lush forest planet is the first forest-themed biome in Helldivers 2. Official in-game lore description: Our democratic galaxy boasts unparalleled breathtaking beauty.As humanity expands into new star territories,numerous pristine planets have been discovered.These worlds are covered in tranquil lush forests and winding woodland paths.Ancient giant trees tower high, casting dense shade across the land.Beneath the peaceful canopy, citizens may rest and relieve their weariness.They reflect on the glory of Managed Democracy, 5. Hidden Major Threats on the New Planets These seemingly peaceful forest planets hide enormous potential dangers.Interstellar detection data shows the region is far from safe.Large numbers of undemocratic hostile forces have been detected in surrounding space.High-risk anomalous signals have also been found on haze-shrouded planets.The signal scale far exceeds standard Automaton convoys.Its signature is extremely similar to Bile Titan readings detected across other regions.This means unknown massive high-level threats are lurking within the new territories. Visit our website MMOWOW to get helldivers 2 items at the cheapest rate on the web. We offer quick delivery, safe payments, and 24x7 chat support.

Overlooked Rare Pokémon: A Complete Guide to 18 Forgotten Creatures
Posted: May 08,2026Keywords: Rare Pokémon, Forgotten Pokémon Abstract: The Pokémon franchise has grown for 30 years and now boasts over 1,000 unique creatures. While everyone knows iconic fan favorites, tons of rare Pokémon fly under the radar and end up totally ignored by mainstream fans. In this guide, we’re breaking down 18 awesomeforgotten Pokémon most players have never even heard of, covering their lore, in-game appearances, and why they’ve faded into obscurity. The Current State of Rare & Forgotten Pokémon With nine generations under its belt, Pokémon now has an enormous roster of creatures. Still, nearly all the spotlight goes to the original 151 classic Pokémon. This leaves hundreds of cool rare Pokémon overlooked and underappreciated by casual players. Overseas official promotions, merchandise drops, and anime screen time heavily favor popular mascot Pokémon, causing tons of uniqueforgotten Pokémon to stay hidden in the background. Even with official Pokémon Centers open in the US and UK, these rare Pokémon rarely get their moment to shine. For the most part, forgotten Pokémon only stay slightly relevant thanks to rotating Pokémon Go events and occasional mainline DLC appearances. A great example is Castform, the quirky weather-type Pokémon that only spawns in *Brilliant Diamond and Shining Pearl*. It barely shows up in modern Switch games and only acts as a small background item in spin-off content, making it one of the most well-known rare Pokémon no one remembers. Even during Pokémon’s 30th anniversary events, popular stars take center stage, leaving these hiddenforgotten Pokémon only recognized by hardcore fans. Why So Many Rare Pokémon End Up Forgotten It’s easy to wonder why so many awesome rare Pokémon disappear from the community spotlight. The main reasons are super simple: limited game appearances, almost zero official promotion, and frustratingly difficult unlock methods. Most forgotten Pokémon only appear in one single generation, with no remakes, no anime episodes, and barely any official merch. Unlike household names like Pikachu and Charizard, these rare Pokémon have tiny TCG collections and almost no merchandise support. On top of that, modern Nintendo Switch consoles don’t support old game backwards compatibility, making these rare Pokémon even harder to find. Most classicforgotten Pokémon debuted on old Game Boy and DS titles and can only be obtained today by purchasing extra paid DLC. Casual players won’t grind through old content or buy extra expansions just to collect obscure creatures. That’s why these unique rare Pokémon remain niche, hidden gems only veteran collectors know about. Full List & Casual Breakdown of 18 Forgotten Rare Pokémon We’ve rounded up 18 genuine rare Pokémon that almost always slip under players’ radars. These forgotten Pokémon span multiple generations, including fossil types, Ultra Beasts, legendaries, and brand-new Gen 9 creatures. Each one has unique traits, fun lore, and very little mainstream exposure. Here’s every overlooked rare Pokémon explained in simple, player-friendly detail. 1. Barraskewda (#0847, Water-type) Barraskewda is a speedy aquatic rare Pokémon first introduced in *Sword and Shield*. This fast-swimming predator races through water at over 100 knots and constantly fights Finizen schools for food. Even though it appears in *Scarlet and Violet*, it’s a total forgotten Pokémon with zero official Pokémon Center merch and only five TCG cards. Evolving from Arrokuda, this fierce fish has a badass defensive skill set but never gets the official spotlight it deserves. 2. Durant (#0632, Bug/Steel-type) Durant is an intimidating giant ant rare Pokémon from Generation 5’s *Black and White* games. It uses its massive mandibles to crush rock and works with its colony to protect eggs from wild predators. It has a solid 19 TCG cards and a short anime appearance, yet only one official plush exists. This underrated forgotten Pokémon has amazing competitive potential but has slowly faded from public attention. 3. Terrakion (#0639, Rock/Fighting-type) Terrakion is one of the iconic Swords of Justice legendary rare Pokémon. In Unova lore, it bravely defends weaker Pokémon and even stood against humans to protect its kind. It even scored a cool Paradox form (Iron Boulder) in *The Indigo Disk* DLC, yet it’s still a heavily forgotten Pokémon. With only 15 cards and one official item, it’s massively overshadowed by other popular legendary Pokémon. 4. Stakataka (#0805, Rock/Steel-type) Stakataka is a bizarre Ultra Beast rare Pokémon from Generation 7. Its body is made of stacked mysterious lifeforms, letting it act like a moving defensive wall. This uniquely designed forgotten Pokémon only has one plush toy and seven trading cards. It last appeared in *Sword and Shield*’s Crown Tundra DLC and has been completely ignored in newer Pokémon content ever since. 5. Arctovish (#0883, Water/Ice-type) Arctovish is a super interesting fossil rare Pokémon revived from mixed prehistoric fish and dinosaur fossils. It has a weird structural flaw — its mouth sits on top of its head — making hunting and eating incredibly difficult, which explains its ancient extinction status. This cool yet tragic forgotten Pokémon only has one official plush and four cards, with no new appearances after *Sword and Shield*. 6. Bruxish (#0779, Water/Psychic-type) Bruxish is a vibrant, eye-catching Alolan rare Pokémon with a fun quirk: it grinds its teeth to stimulate its brain and fire off powerful psychic energy. When it grinds its teeth, surrounding water sparkles beautifully. Despite its gorgeous design, it’s a severely forgotten Pokémon. It only spawns in *Scarlet and Violet* on Switch, with just eight TCG cards and one official plush, receiving almost no long-term official promotion. 7. Palafin (Hero Form) (#0964, Water-type) Palafin Hero Form is a Gen 9 exclusive rare Pokémon with insanely overpowered hidden stats. This ocean hero can lift entire cruise ships with one fin and saves drowning Pokémon and humans at sea. It requires tricky Union Circle co-op evolution and only transforms during battles. Even with such a unique concept, it’s a widely forgotten Pokémon, with minimal anime screen time and barely any official merchandise. 8. Ferrothorn (#0598, Grass/Steel-type) Ferrothorn is a classic fan-favorite competitive rare Pokémon from Generation 5. It scrapes its steel thorns against rocks to absorb nutrients and boasts incredible defensive stats. Once a staple competitive powerhouse, it’s now a largely forgotten Pokémon. It only has 11 trading cards and one plush, completely disappearing from modern battle meta discussions. 9. Arctozolt (#0881, Electric/Ice-type) Arctozolt is another quirky Galar fossil rare Pokémon. It generates electricity by shaking its icy upper body, but its extremely slow movement speed caused it to go extinct in prehistoric times. This goofy, unique forgotten Pokémon only has three cards and one official plush, rarely popping up in any modern mainline Pokémon games. 10. Blipbug (#0824, Bug-type)| Blipbug is a super intelligent larva rare Pokémon from the Galar region. It loves collecting information and has a sharp mind, though it’s physically weak. While its final evolution Orbeetle has a popular Gigantamax form, Blipbug itself is a total forgotten Pokémon. It only has seven cards and one tiny pin accessory, making it one of the hardest Pokémon to collect merch for. 11. Rabsca (#0954, Bug/Psychic-type) Rabsca is a weird and wonderful Gen 9 rare Pokémon that carries and protects sleeping baby Pokémon inside its spherical shell. It evolves through a tedious Let’s Go walking method that most casual players never unlock. With zero official merchandise, six cards, and only one anime episode appearance, it’s one of the most obscure forgotten Pokémon in the Paldea region. 12. Bramblin (#0947, Grass/Ghost-type) Bramblin is a wandering tumbleweed rare Pokémon formed from lost souls tangled in dry grass. It drifts endlessly across barren wilderness and hates getting wet. As a rare Grass/Ghost-type creature with a hauntingly cool design, it deserves way more love. Still, it’s a classic forgotten Pokémon, with no merch and only five TCG cards total. 13. Runerigus (#0867, Ground/Ghost-type) Runerigus is a fascinating Galar regional variant rare Pokémon that evolves from a damaged Galarian Yamask. It’s essentially a cursed ancient painting brought to life, holding terrifying historical memories within its shadowy body. Its super strict evolution requirements make it tough to obtain, turning this unique Pokémon into a totally forgotten Pokémon with just three cards and zero official goods. 14. Whismur (#0293, Normal-type) Whismur is a classic Hoenn-region rare Pokémon famous for its deafening 100-decibel cries. Its own loud noise even scares itself, causing it to cry nonstop until exhaustion. While it has decent merch availability and 12 TCG cards, it almost never appears in modern Switch games, making it a nostalgic yet forgotten Pokémon for new-generation players. 15. Druddigon (#0621, Dragon-type) Druddigon is a rare pure Dragon-type rare Pokémon from Unova. It sunbathes daily to keep its body functional and even steals nests from other Pokémon to claim as its own. Pure Dragon types are incredibly valuable, yet this cool creature is a heavily forgotten Pokémon, only available in old DLC content with just 15 cards and one single plush toy. 16. Golett (#0622, Ground/Ghost-type) Golett is an ancient artificial rare Pokémon crafted by a long-lost prehistoric civilization. It runs on mysterious eternal energy that’s slowly fading over thousands of years. Boasting the super rare Ground/Ghost typing and rich lore, it’s still a massively forgotten Pokémon with almost no appearances in modern Pokémon titles. 17. Karrablast (#0588, Bug-type) Karrablast is a unique Generation 5 rare Pokémon with a bizarre evolution rule — it only evolves when paired with a Shelmet. It melts open Shelmet’s shell to eat the contents inside. Its final evolution Escavalier looks awesome with a cool Bug/Steel typing, yet Karrablast itself remains a forgotten Pokémon with limited cards and no mainstream spotlight. 18. Veluza (#0976, Water/Psychic-type) Veluza is a fierce aquaticrare Pokémon newly introduced in Gen 9’s Paldea region. It sheds extra flesh to boost its speed and psychic power, and its discarded flesh is even edible! With no evolutionary line, zero anime appearances, and absolutely no official merchandise, it’s the most obscure and underrated forgotten Pokémon on this entire list. Why These Rare Pokémon Are Still Worth Collecting Even though these rare Pokémon get no love from official campaigns, they have super loyal fan communities. Every single forgotten Pokémon has unique typings, fun backstories, and special battle mechanics that make them way more interesting than overused popular Pokémon. From Ferrothorn’s unbeatable defensive build to Veluza’s weird shedding ability and Golett’s ancient civilization lore, these rare Pokémon add so much depth to the Pokémon universe. Official Pokémon content always prioritizes new releases, leaving older rare Pokémon forgotten and unsupported. Thankfully, hardcore fans keep these forgotten Pokémon alive by exploring their lore, testing competitive builds, and sharing fun facts online. These underrated rare Pokémon hold unique charm that every true Pokémon fan should experience at least once. Conclusion & Where to Get All Forgotten Rare Pokémon At the end of the day, most Pokémon in the franchise are hidden rare Pokémon that never get the spotlight they deserve. These forgotten Pokémon carry generations of nostalgic memories, unique designs, and fun gameplay mechanics that make Pokémon collecting so rewarding. Whether you’re a competitive battler, a completionist collector, or a casual fan hunting unique creatures, adding these rare Pokémon to your roster brings tons of exclusive fun. Tired of endless grinding, complicated DLC unlocks, and low spawn rates when trying to collect these elusive rare Pokémon and forgotten Pokémon? Head over to MMOWOW, your go-to platform for all Pokémon collecting needs. MMOWOW offers full-generation Pokémon collections, hard-to-find rare Pokémon, battle-ready competitive creatures, and exclusive in-game resources. Every single forgotten Pokémon listed above is available here. Enjoy cheap prices, 24/7 automatic delivery, safe and secure transactions, and round-the-clock customer support. Complete your Pokédex and build your dream rare Pokémon team effortlessly at MMOWOW!


- 1
- 2
- 3
- 4
- ...
- 65